While creating services, you may want to add or customize hymns in Christian Worship: Service Builder.
The My Hymns view starts with the three-part view:
The left side is a list of all available items where categories can be added to the list to better organize it.
The center part of the view shows a text field where the content of the element can be created and formatted. Above the format bar are tabs for different types of content that can make up the element.
Content types include these:
- Text—This is for elements that consist of text only, like prayers and blessings.
- Text with Stanzas—This allows you to number and add text for stanzas. You can also select which stanzas will be used when you plan the service.
- Melody—This allows you to add text and then insert a melody line that will always be visible.
- Melody with Stanzas—This allows you to add an engraving of a song, which can show both the verses and the melody line. This is most useful for adding hymns.
- Setting with Stanzas—Setting with Stanzas should be used if you want to add the entire sheet of music for a song.
Hymns can be added by clicking “Add” in the bottom left corner and selecting "Add a hymn".
The right part of the screen contains details such as hymn name, number, or melody.
The view can be changed quickly to show other worship resources by clicking the title in the upper left corner. Clicking the title displays a drop-down menu of all the different types of worship resources.
Here is how to create a new hymn:
- From any view, click the settings icon in the upper right corner and mouse over “My Worship Resources”.
- Select "My Hymns". This will open the My Hymns view.
- In the bottom left corner, click “Add”.
- Name the new hymn and move it into any category you like.
- Different resources have a variety of content already added by default. To add other content, click the “Add” option to the right of the tabs at the top..
- Add anything to the content by using the text editor in the center portion of the screen.
- Fill in additional information in the panel on the right side of the screen.
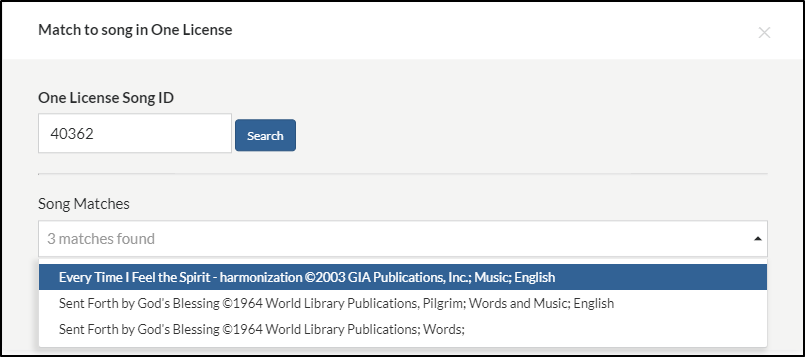
You'll also need to add in any copyright information for this hymn as well. Click the "Add Copyright" link on the right side of the screen. Fill in the year, copyright holder, and admin. Then, click the "Match to song in One License" link. In the window that appears, fill in the One License Song ID in the appropriate field, and click search. This will bring up the song in the "Song Matches" box. Select the appropriate copyright information, and then click Save. Then, at the My Worship Resources window, in the bottom right, click Save.
Here is how to edit an existing hymn:
- When in a bulletin or presentation view, select the hymn you would like to edit.
- On the hymn's element tab, click "Edit". This will open the selected hymn in the My Hymns view.
- Name the new hymn and move it into any category you like, if desired.
- To add more content, click the “Add” option to the right of the tabs at the top..
- Edit the content or formatting by using the text editor in the center portion of the screen.
- Fill in additional information in the panel on the right side of the screen.
- Click “Save” in the lower right corner.

